- Home
- Piano Scales
- 3 Minor Scale Patterns
3 Minor Scale Patterns on the Piano
This article may contain compensated links. Please read the disclosure for more info.
Learn how to play the three minor scale patterns easily in this piano lesson tutorial for beginners. You don’t even need to know how to read notes!
Learn the 3 Minor Scale Patterns
In this piano lesson tutorial, you'll learn how to easily play the three minor scale patterns Natural, Harmonic, and Melodic minor.
Using the major scale pattern as our template, you'll learn the changes you need to do for it to turn into minor, and you'll be able to see and understand the differences between the natural, harmonic, and melodic minor scales.
We'll only use scales that share the same fingering and play just one octave with both hands but separately, so that'll be easy to learn and remember.
Let's get started!
TIP: As you continue to learn piano it's a good idea to get a great piano scale, chords and arpeggios technique book like this one: Basic Book of Scales Chords and Arpeggios.
Using The Major Scale as a Template

As you might know, scales are notes organized from lowest to highest with different distances, or Intervals, apart.
Precisely these intervals are the elements that create the different styles of scales—major, minor, modal, or any scale.
The major scale is just one pattern of several, but it's easy to learn. And once you've learned it, there's no need to learn all the patterns of the minor scales since you can use the major scale as a template and make slight alterations.
This formula is what I will teach you today. But first, let's review some basics.
The Major Scale Pattern
I have written more about major scales here, but I'll remind you how the major scale is built for this lesson.
Then we'll use it to make three types of minor scales with a formula that's easy to remember. Another advantage here is that the fingering stays the same!
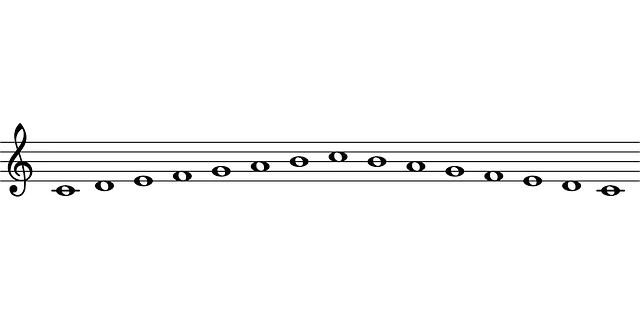
The pattern of a major scale is built with half and whole steps. A half step or semitone is the smallest distance from one key to the next on a piano (black or white). Two half steps are a whole step.
Starting from the lowest note (the note that gives the name to the scale), it follows a series of steps like this:
Whole-Whole-Half-Whole-Whole-Whole-Half

When you know the major scale pattern, you can play a major scale from any key on the piano. This is the only pattern you actually need to memorize since you'll learn the formula for minor scales below!
Piano Scale Fingering
The piano scale fingering we'll use in this exercise is a basic fingering used in all major and minor scales.
Fingers 1-2-3 and 1-2-3-4 are the two finger groups we'll use in all the major and minor scales.
Finger number 5 is a "stop" and "turn" finger. You will be using this finger since we'll only play one-octave scales. When you play a scale over many octaves, you'll only play the 5th finger when the scale stops or turns.
In case you need a reminder, here are the finger numbers:

Turning a Major Scale to a Minor Scale
Follow the steps below to learn the formula for turning the major scale into a minor scale:
Step 1
Review a C major scale in one octave, ascending and descending. Practice each hand separately.
Right-hand fingering:

Left-hand fingering:

Step 2
Number each step in the scale from the lowest 1 to the highest 7. The last step is the same key as the one we started on, but an octave higher, (in this case C), so it counts as 1 again.

Step 4
Now, memorize this simple formula: (367, 36, 3)
- Natural Minor: Lower steps 3,6,7
- Harmonic Minor: Lower steps 3,6
- Melodic Minor: Lower step 3 only when ascending. When descending it's the same as the Natural Minor above, 3 6 7.
Let's practice!
Natural Minor. Steps 3, 6 and 7 lowered, right-hand fingering:

Natural Minor. Steps 3, 6 and 7 lowered, left-hand fingering:

Harmonic Minor. Steps 3 and 6 lowered, right hand:

Harmonic Minor. Steps 3 and 6 lowered, left hand:

Melodic Minor. Steps 3 lowered, right hand ascending:

Melodic Minor. Steps 3, 6 and 7 lowered, right hand descending:
Same as Natural Minor above.
Melodic Minor. Steps 3 lowered, left hand ascending:

Melodic Minor. Steps 3, 6 and 7 lowered, left hand descending:
Same as Natural Minor above.
Step 5
Now, repeat this exercise with the G, D, A and E major scales. It’s the same formula and fingering!
I hope you liked this easy method to learn the 3 minor scale patterns by playing them in this way!
I chose to use only scales starting from a white key to make this easier for beginners, but if you're ready to learn the correct fingering for all minor scale patterns, also starting from a black key, make sure to check out these lessons here:
These lessons have piano scale charts for all minor scales so it's easy to see and use for beginners.

You might like these
Common Music Scales in Western Music Traditions
Common music scales: Colors of Sound. A musical scale creates a particular mood; like happy or sad, “oriental” or “bluesy” for example.
Easy Piano Scales with Lessons, Charts and PDF's
Learn how to play piano scales in major, minor and other interesting modes. Free piano lessons and printable scale charts for beginners. Let's get playing!
Harmonic Minor Scales and Piano Charts
Learn all the 12 harmonic minor scales with fingering! They're easy to see and play as picture scales.

Recent Articles
-
The 3 Minor Scale Patterns on the Piano
Jun 02, 23 11:06 AM
Learn to play the 3 minor scale patterns easily in this piano lesson tutorial for beginners. No note reading required! -
Piano Playing Technique: Best Adult Beginner Piano Technique Books
May 25, 23 06:18 AM
What are the best books to build a great piano playing technique? Here is a step by step plan with effective piano technique books for adult beginner pianists. -
Find a Piano Teacher: How to Discover Exceptional Instructors
Mar 15, 23 05:48 AM
How do you find a piano teacher that's right for you? Here's a practical guide on what to look for and how to find the best piano teacher for you or your child.
Stay Updated
Be the first to know what's new at OnlinePianoCoach.com by subscribing to our monthly newsletter, The Piano Player!


Home | About | Contact | Sitemap | Privacy Policy | Disclaimer | FTC Disclosure
Get Piano Tips & Tricks!

Download your FREE Piano Practice and Technique eBook, and stay up-to-date with my monthly newsletter "The Piano Player", with playing tips & tricks to keep you practicing!
Copyright © 2011– OnlinePianoCoach.com. All Rights Reserved